使用Python给Wordpress发布文章,我们可以通过两种方式实现:
1、通过xmlrpc,详细操作可以看这里
2、直接操作数据库。
其实大多数情况下,使用第一种方法就可以满足需求了,可是有时候xmlrpc却无法满足我们的需要,比如我之前就遇到过:网站中安装了WP Job Manager插件,发布的文章类型变成了“job_listing”,写入数据的时候,job_listing_category和location这两个字段总是无法成功写入数据。所以,自己今天又研究了一下python直接操作Wordpress数据库发布文章的功能。由于自己对SQL语法不熟悉,花了我大半天时间才折腾成功。
一、建立虚拟环境
需要安装的库:
mysqlclient==1.4.2.post1
二、查询数据库
代码如下:
7 | db = MySQLdb.connect("localhost", "root", "", "01py", charset='utf8' ) |
13 | sql = "SELECT * FROM wp_posts WHERE post_author =1" |
16 | # Execute the SQL command |
18 | # Commit your changes in the database |
24 | data = cursor.fetchall() |
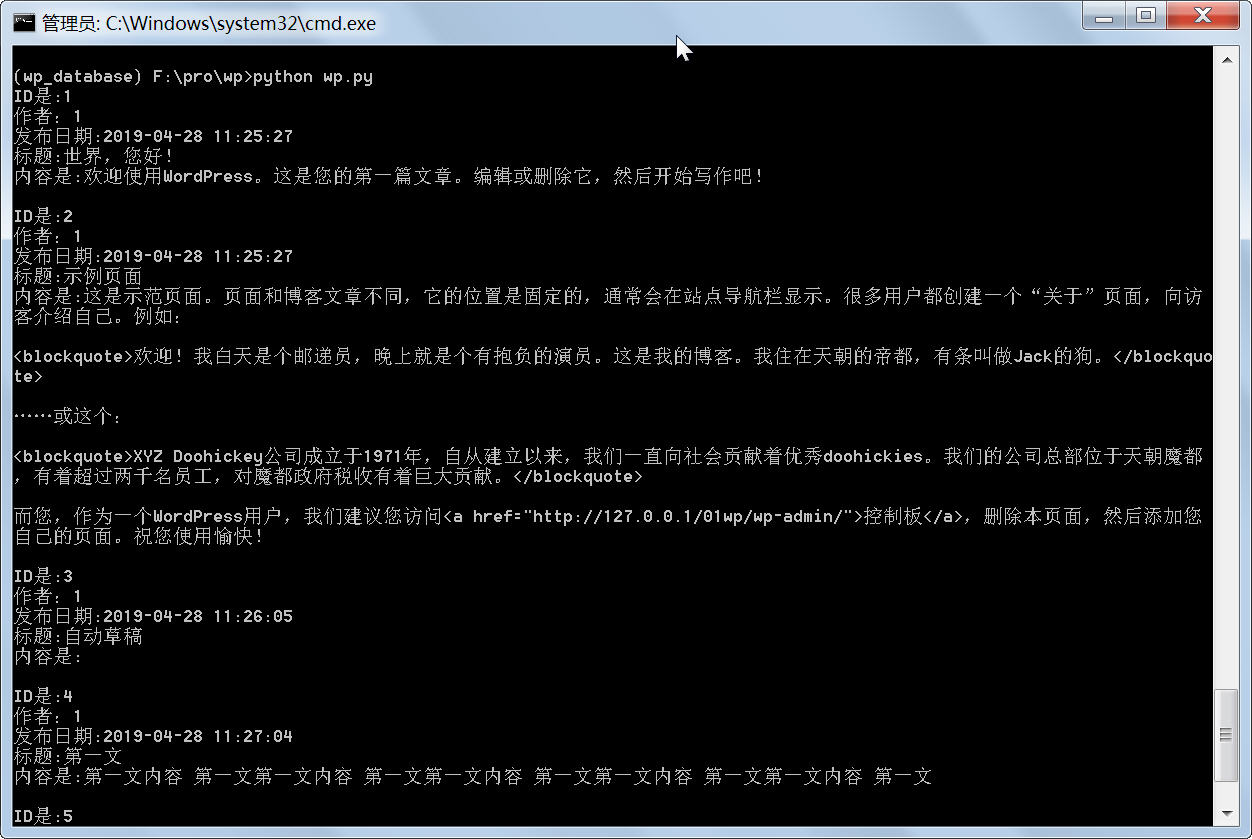
32 | print("ID是:{}\n作者:{}\n发布日期:{}\n标题:{}\n内容是:{}\n ".format(ID,author,postdate,title,content)) |
执行结果:

三、发布文章
最终代码
8 | db = MySQLdb.connect("localhost", "root", "", "01py", charset='utf8' ) |
14 | post_content = "python这是文章内容测试" |
15 | post_title = "title标题测试New" |
16 | post_name = "must_be_only_english" |
19 | times=time.strftime('%Y-%m-%d %H:%M:%S',time.localtime(time.time())) |
23 | sql = """INSERT INTO wp_posts(post_author,post_date,post_date_gmt,post_content,post_title,post_excerpt,post_status,comment_status,ping_status,post_password,post_name,to_ping,pinged,post_modified,post_modified_gmt,post_content_filtered,post_parent,guid,menu_order,post_type,post_mime_type,comment_count) |
24 | VALUES ('1','%s','%s','%s','%s','','publish','open','open','','%s','','','%s','%s','','0','http://127.0.0.1/01wp/?p=20','0','post','','0')""" % (str(times),str(times),str(post_content),str(post_title),str(post_name),str(times),str(times)) |
28 | # Execute the SQL command |
30 | # Commit your changes in the database |
32 | post_id = cursor.lastrowid |
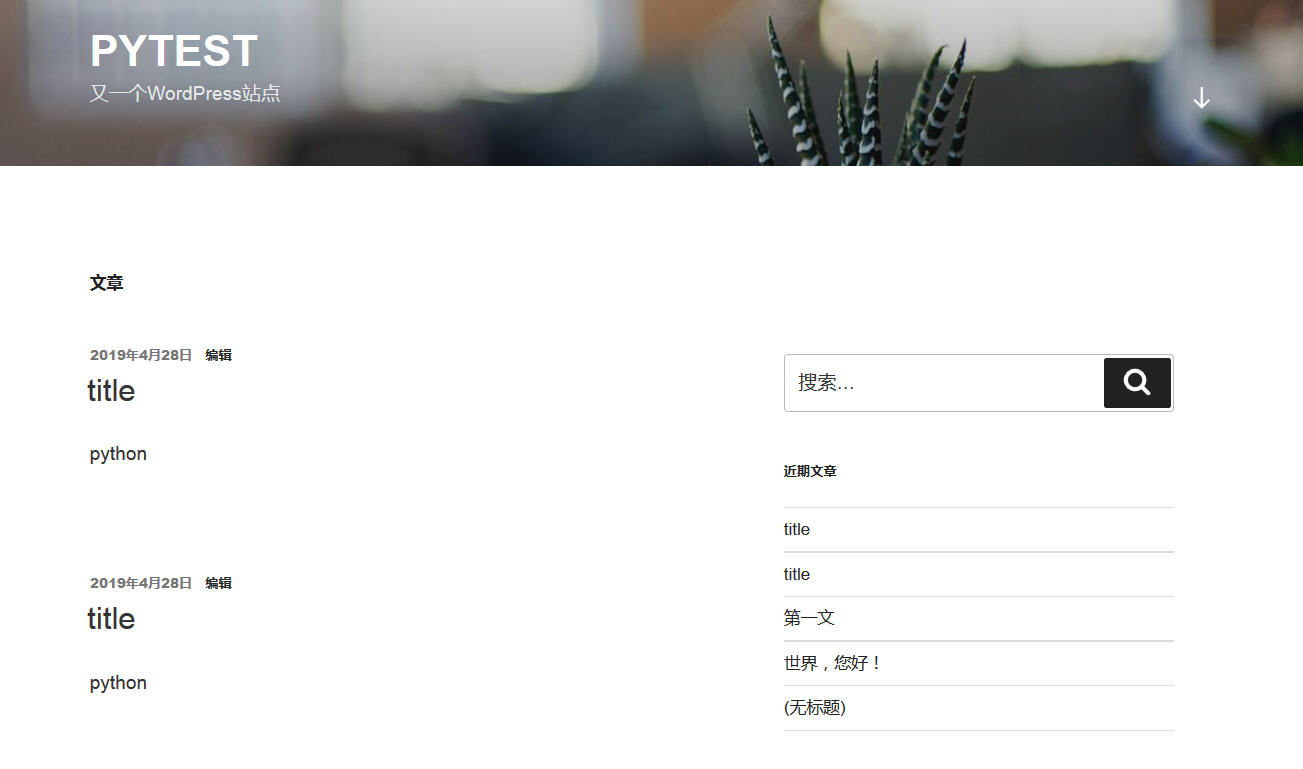
34 | print("成功插入数据,数据编号为{}".format(post_id)) |
效果展示:


需要解决的问题:发布的文章“分类目录”那一栏是空的。
看了一下,wordpress的分类目录牵涉到下面两个表:
wp_terms:存储每个目录、标签
wp_term_relationships:存储每个文章、链接和对应分类的关系
所以如果要将上面的代码用于项目的话,还需要继续完善。
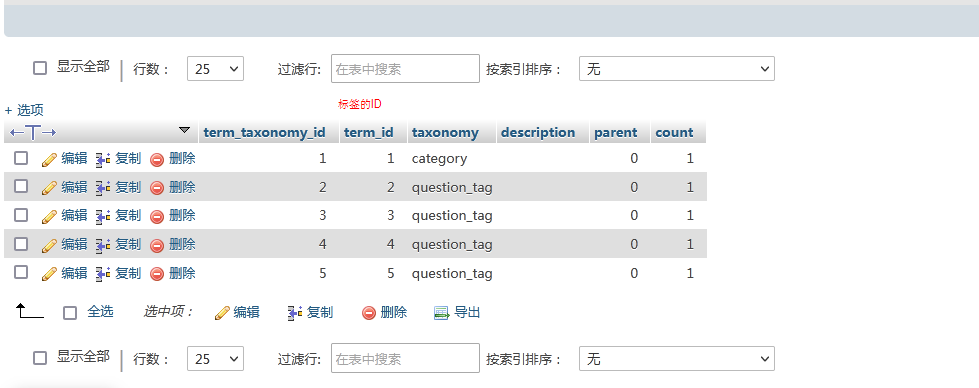
另外,如果要实现标签功能的话,除了上面2张表,还需要修改wp_term_taxonomy这张表。

另外,学习python操作数据库可以看这里。
Python操作Mysql实例教程手册(带书签)
四、如何发布文章缩略图?
1 | from wordpress_xmlrpc import Client, WordPressPost |
2 | from wordpress_xmlrpc.methods.posts import GetPosts, NewPost |
3 | from wordpress_xmlrpc.methods.users import GetUserInfo |
4 | from wordpress_xmlrpc import Client, WordPressPost |
5 | from wordpress_xmlrpc.compat import xmlrpc_client |
6 | from wordpress_xmlrpc.methods import media, posts |
12 | post = WordPressPost() |
13 | post.title = content['title'] |
14 | post.content = content['body'] |
16 | 'post_tag': ['AutoBlogger', 'BotPosted'], |
17 | 'category': ['News', 'Update'] |
19 | # Lets Now Check How To Upload Media Files |
23 | 'type': 'image/jpeg' # Media Type |
25 | # Now We Have To Read Image From Our Local Directory ! |
26 | with open(filename, 'rb') as img: |
27 | data['bits'] = xmlrpc_client.Binary(img.read()) |
28 | response = wp.call(media.UploadFile(data)) |
29 | attachment_id = response['id'] |
31 | # Above Code Just Uploads The Image To Our Gallery |
32 | # For Adding It In Our Main Post We Need To Save Attachment ID |
33 | post.thumbnail = attachment_id |
34 | post.post_status = 'publish' |
35 | post.id = wp.call(posts.NewPost(post)) |
36 | # Set Default Status For Post .i.e Publish Default Is Draft |
38 | # We Are Done With This Part 🙂 Lets Try To Run It |
39 | print("Sucessfully Posted To Our Blog !") |
参考:https://www.youtube.com/watch?v=W0ksqbNBRoc
原载:蜗牛博客
网址:http://www.snailtoday.com
尊重版权,转载时务必以链接形式注明作者和原始出处及本声明。


